Welcome! This guide unlocks the full potential of your One For All universal remote, simplifying home entertainment control.
It provides detailed instructions for setup, programming, and troubleshooting, ensuring seamless operation with your devices.
Discover how to consolidate multiple remotes into one convenient solution, enhancing your viewing experience.
What is a One For All Remote?
A One For All remote is a universal remote control designed to replace multiple individual remotes for your various home entertainment devices. Instead of juggling separate controls for your TV, DVD player, sound system, and more, a single One For All remote can manage them all.
These remotes are pre-programmed with codes for a vast range of brands and models, allowing you to easily program it to work with your specific equipment. The key benefit lies in its ability to “learn” functions from existing remotes, offering unparalleled customization.
Whether you choose direct code entry or the automatic code search method, setup is straightforward. It’s a convenient solution for simplifying your entertainment setup and reducing clutter, offering a streamlined user experience.
Benefits of Using a Universal Remote
Simplify your entertainment center: Eliminate the clutter of multiple remotes with a single, easy-to-use One For All remote. This streamlines your setup and reduces the frustration of searching for the right control.
Cost-effective solution: Avoid the expense of replacing lost or malfunctioning remotes. A universal remote is a one-time investment that can control numerous devices;
Enhanced convenience: Effortlessly switch between devices with pre-programmed codes or customized settings. Learning functionality allows copying functions from existing remotes.
Easy programming: Direct code entry and automatic search methods make setup simple, even for those unfamiliar with universal remotes. Enjoy a more relaxed and enjoyable viewing experience!
Package Contents
Your One For All package should include the following items:
- One (1) One For All Universal Remote Control: The primary device for controlling your home entertainment system.
- One (1) Instruction Manual: This comprehensive guide provides step-by-step instructions for setup, programming, and troubleshooting.
- Batteries: Typically, the remote includes the necessary batteries to begin operation immediately. (Check packaging for battery type and quantity).
Please verify that all components are present. If any items are missing or damaged, contact customer support for assistance. Retain the original packaging for potential returns or warranty claims. Proper inventory ensures a smooth setup process and optimal performance of your new remote control.
Getting Started
Let’s begin! This section guides you through the initial setup of your One For All remote, covering battery installation and familiarizing yourself with its features.
Installing Batteries
Powering Up Your Remote: To begin using your One For All remote, you’ll need to install batteries. Locate the battery compartment, typically on the back or bottom of the remote. Gently slide or pop open the compartment cover.
Insert the correct type and number of batteries, paying close attention to the polarity markings (+ and -) inside the compartment. Incorrect battery installation will prevent the remote from functioning. Usually, two AAA or AA batteries are required, but consult your specific model’s documentation for confirmation.
Once the batteries are securely in place, close the compartment cover until it clicks shut. Your remote should now be ready to power on and begin the setup process. Ensure the batteries are fresh for optimal performance and longevity.
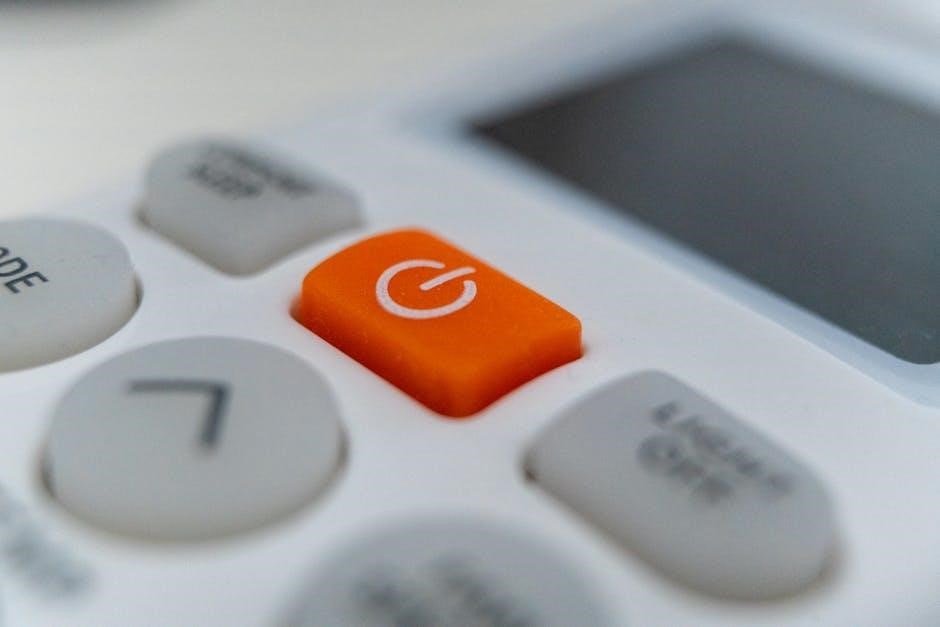
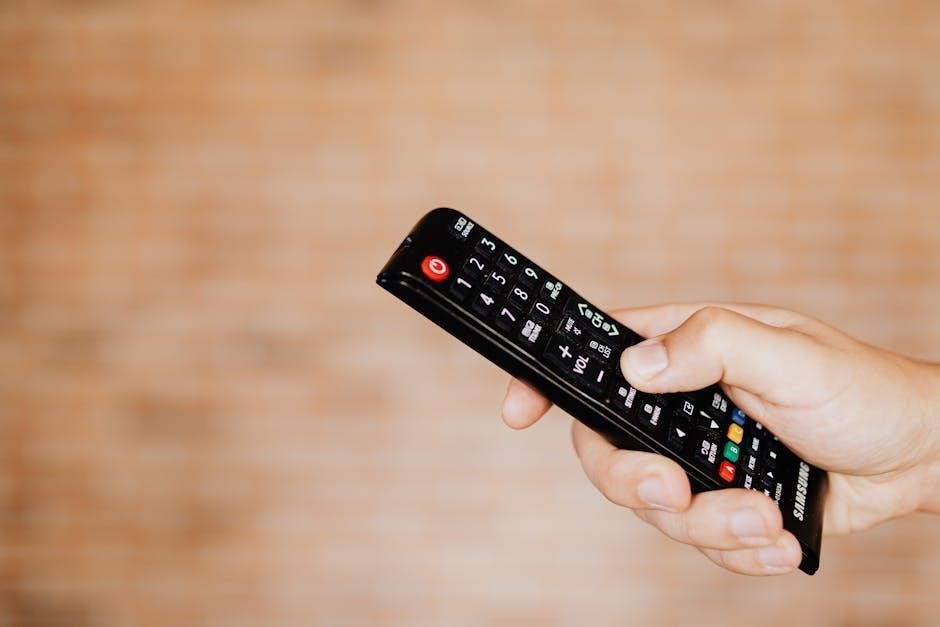
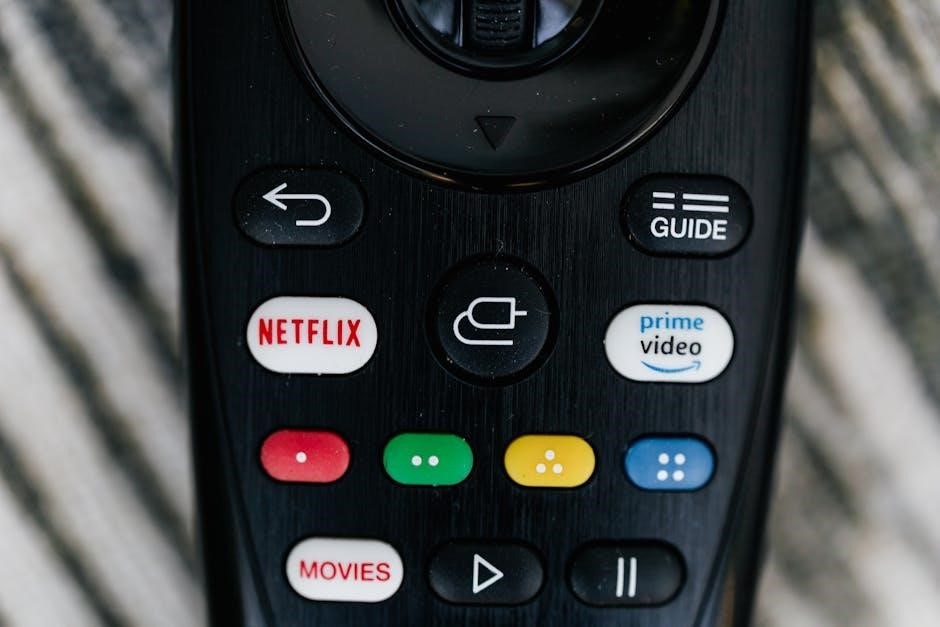
Understanding the Keypad Layout
Navigating the Buttons: Your One For All remote features a carefully designed keypad for intuitive control. The directional pad allows for menu navigation, while the number buttons provide direct channel access. Dedicated buttons for power, volume, and channel changes are prominently placed for quick adjustments.
You’ll also find buttons for accessing specific functions like input selection, settings, and playback controls (play, pause, stop, rewind, fast forward). Some models include shortcut buttons for popular streaming services. Familiarize yourself with the layout to maximize efficiency.
The ‘Setup’ or ‘Magic’ button initiates programming procedures. Refer to the button legends for their specific functions on your model. A clear understanding of the keypad is crucial for successful operation;
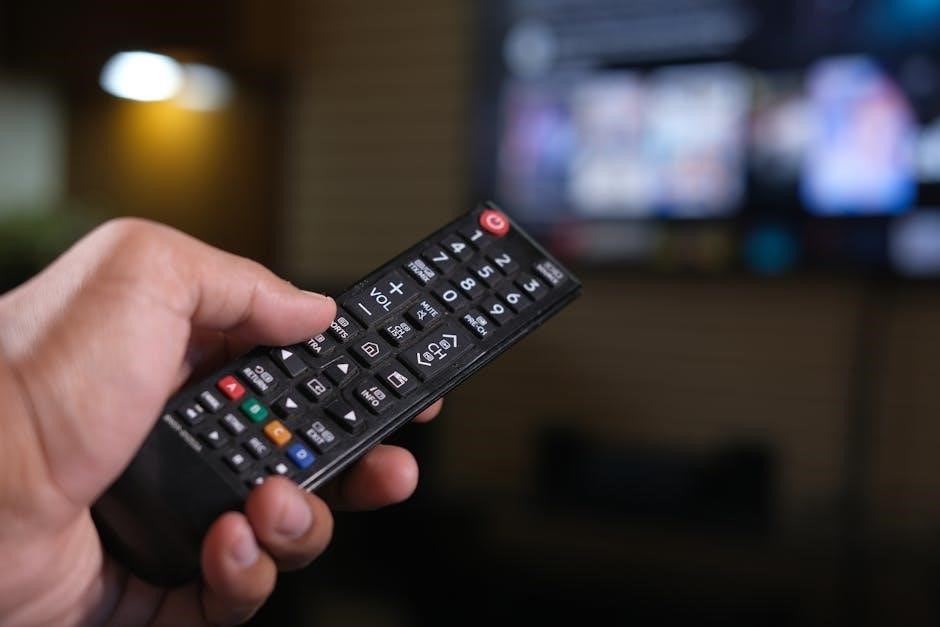
Remote Control Overview ― Buttons and Functions
Essential Controls: The Power button turns your connected device on and off. Volume Up/Down and Channel Up/Down control audio and channel selection respectively. The Mute button silences the audio. Input/Source allows you to switch between connected devices (e.g., TV, DVD player, cable box).
Navigation & Playback: The directional pad navigates menus, while the ‘OK’ or ‘Select’ button confirms selections. Playback controls – Play, Pause, Stop, Rewind, and Fast Forward – manage media playback. The Menu button accesses device settings.
Special Features: The ‘Setup’ button initiates programming. Some remotes have dedicated streaming service buttons; Learning functionality, if available, allows copying functions from other remotes. Explore each button to unlock the full potential of your One For All remote.
Programming Your Remote
Let’s begin! Your One For All remote offers two primary programming methods: direct code entry and automatic code search, ensuring compatibility with your devices.
Follow the steps carefully for a successful setup and enjoy simplified control.
Direct Code Entry Method
Utilizing Device Codes: This method requires finding the specific code for your television brand. A comprehensive code list is available within the included manual or online resources.
Locating Your Code: Begin by identifying your TV manufacturer. Then, consult the code list, noting the codes associated with your brand. It’s often beneficial to try multiple codes if the first attempt is unsuccessful.
Code Input Procedure: With your remote powered on, press and hold the ‘Setup’ or ‘Magic’ button (refer to your remote’s layout). The indicator light will illuminate, signaling readiness. Enter the four or five-digit code using the number keys.
Verification: After entering the code, the remote will attempt to communicate with your TV. Test key functions like volume and channel changing to confirm successful programming. If unresponsive, repeat the process with another code for your brand.
Finding the Correct Code for Your TV Brand
Code Lists are Key: Locating the correct code is crucial for successful programming. Your One For All remote comes with a printed code list, categorized by television brand. Alternatively, an extensive and updated code database is readily accessible online through the manufacturer’s website.
Brand Specificity: Ensure you select the code list corresponding to your exact TV brand. Some manufacturers utilize multiple codes; therefore, it’s advisable to try several options within your brand’s section.
Online Resources: The online code finder often allows searching by model number for increased accuracy. This can be particularly helpful for less common or newer television models.
Trial and Error: If the initial code doesn’t work, systematically test other codes listed for your brand. Keep a record of attempted codes to avoid repetition. Patience is key to finding the correct match!
Entering the Code
Initiate Code Entry: Begin by pressing and holding the ‘Setup’ or ‘Magic’ button on your One For All remote until the indicator light illuminates, signaling it’s in programming mode. This is a vital first step for the remote to accept the new code.
Numerical Input: Using the number pad, carefully enter the four or five-digit code you’ve identified for your TV brand. Ensure accuracy; even a single incorrect digit will prevent successful programming.
Code Confirmation: After entering the code, the indicator light will typically blink or turn off, indicating the remote has accepted the code.
Testing Functionality: Immediately test the code by attempting basic functions like power on/off, volume control, and channel changing. If these functions work, programming is complete!
Automatic Code Search Method
Initiating the Search: If direct code entry fails, the automatic code search is your next best option. Press and hold the ‘Setup’ or ‘Magic’ button until the indicator light activates, signifying programming mode. Then, press and hold the ‘Power’ button. The remote will begin sending power signals to your TV.
Monitoring the TV: Watch your TV closely. As the remote cycles through codes, your TV may briefly turn on or off.
Stopping the Search: Once your TV responds by turning off, immediately press any button (except ‘Setup’ or ‘Power’) to stop the search and save the code.
Confirmation is Key: Always test all essential functions after the search to ensure the correct code was found and the remote operates flawlessly.
Initiating the Code Search
Preparation is Crucial: Ensure your TV is powered on before starting the automatic code search. Point the remote directly at your TV, maintaining a reasonable distance for optimal signal transmission. Begin by pressing and holding the ‘Setup’ or ‘Magic’ button – the indicator light will illuminate, confirming entry into programming mode.
Power Button Activation: While the indicator light remains lit, press and hold the ‘Power’ button. The remote will now systematically transmit power signals, cycling through a vast library of codes designed for various TV brands.
Patience is a Virtue: This process may take several minutes, so remain patient and observant.
Testing the Code
Confirmation is Key: Once the TV responds by turning off (or on, depending on its initial state), immediately release the ‘Power’ button. This signifies the remote has likely found a compatible code for your television. However, further testing is essential to confirm full functionality.
Essential Functionality Check: Attempt to use other crucial functions like volume control, channel changing, and menu navigation. If these functions operate correctly, the code is confirmed as a successful match.
Code Storage: If all functions work as expected, the remote automatically saves the code. If the code is incorrect, repeat the ‘Initiating the Code Search’ process until a fully functional code is found.
Learning Functionality
Expand Control: Your One For All remote can learn commands from other remotes, copying functions not pre-programmed.
This offers ultimate customization and compatibility with various devices.
What is Learning Functionality?
Unlocking Versatility: The learning functionality of your One For All remote is a powerful feature allowing it to mimic commands from other remote controls. This means you can teach your One For All remote functions that aren’t pre-programmed or aren’t supported by direct code entry or automatic code search.
Essentially, it ‘learns’ the infrared (IR) signal emitted by another remote when you press a button on that remote. It then stores this signal and replicates it when you press a corresponding button on your One For All remote. This is incredibly useful for devices with unique functions or older equipment without readily available codes.
It’s a one-time setup process for each function, providing a customized control experience. The learning process is straightforward, making it accessible even for users unfamiliar with remote programming.
Learning from Another Remote ⎻ Step-by-Step Guide
Initiating the Learning Mode: First, put your One For All remote into learning mode – typically by pressing and holding the ‘Learn’ or ‘Setup’ button until the indicator light flashes. Then, point the original remote (the one you’re copying from) towards your One For All remote, ensuring they are a few centimeters apart.
Next, press the button on the original remote that corresponds to the function you want to learn; Simultaneously, press and hold the button on your One For All remote where you want to store that function. The One For All remote should acknowledge the signal – often with a double flash of the indicator light.
Repeat this process for each function you wish to learn. Finally, exit learning mode by pressing the ‘Learn’ or ‘Setup’ button again.
Example: Learning the Volume Function
Let’s learn the volume control! Begin by entering learning mode on your One For All remote, as described previously. Now, take your original TV remote and press the ‘Volume Up’ button. Simultaneously, press and hold the red key (or your chosen button) on your One For All remote. Watch for the confirmation flash – a double blink usually indicates success.
Repeat this process for ‘Volume Down’. Press the ‘Volume Down’ button on the original remote while holding the same red key on your One For All remote. Again, confirm with the indicator light.
You’ve now successfully copied the volume functions! Test by using the red key on your One For All remote to adjust the volume on your TV.
Troubleshooting Common Issues
Facing problems? This section offers solutions for unresponsive remotes, incorrect code entries, and failed learned functions, restoring control quickly.
We’ll guide you through simple fixes to get back to enjoying your entertainment.
Remote Not Responding
Is your One For All remote failing to power on or control your devices? First, check the batteries – ensure they are correctly installed with the proper polarity (+/-) and are not depleted. Replace them with fresh batteries if needed.
Next, verify the line of sight between the remote and the target device. Obstructions can interfere with the infrared signal. Try moving closer and ensuring a clear path.
If the issue persists, attempt a reset. Remove the batteries, press and hold any button for 30 seconds, then reinsert the batteries. This can sometimes resolve software glitches.
Finally, confirm that the correct device is selected on the remote. Accidentally switching to a different device mode can cause it to appear unresponsive to your intended target.
Incorrect Code Entered
Experiencing issues after entering a device code? Don’t worry, it’s a common occurrence! If your TV or device isn’t responding correctly after code entry, it likely indicates an incorrect code was selected.
Double-check the code against the list for your specific TV brand and model. Codes can vary even within the same brand.
If you’re unsure, utilize the Automatic Code Search method. This systematically tests all available codes for your device type, increasing the chances of finding a compatible one.
Remember to test each code thoroughly after entry. If multiple codes are listed, try them sequentially until you find one that fully functions with your device;
Learned Function Not Working
Frustrated that your learned function isn’t performing as expected? Several factors can contribute to this issue. First, ensure a strong, direct infrared signal was exchanged between the original and One For All remote during the learning process.
Check the batteries in both remotes; low battery power can hinder signal transmission. Retrying the learning process can often resolve intermittent issues.
Confirm the original remote is functioning correctly with its intended device. If the source signal is weak or faulty, the learned function will be unreliable.
Some complex functions may not learn perfectly. Try learning simpler functions first to establish a stable connection before attempting more advanced commands.
Advanced Features
Unlock greater control! Explore macro programming for sequential commands, manage multiple devices effortlessly, and customize button functions for a personalized experience.
Macro Programming (If Applicable)
Automate your entertainment! Macro programming allows you to combine several remote control commands into a single button press. This feature streamlines complex operations, such as powering on multiple devices and switching to the correct input, all with one touch.
To create a macro, you’ll typically enter a macro recording mode, then press the buttons in the desired sequence. The remote stores these commands, executing them in order when the macro button is pressed. Refer to your specific model’s instructions for detailed steps, as the process varies.
Macros are ideal for home theater setups, simplifying activities like “Movie Night” or “Gaming Session.” Remember to save your macros and test them thoroughly to ensure they function as intended. Some models may have limited macro storage capacity.
Using the Remote with Multiple Devices
Expand your control! Your One For All remote isn’t limited to just one device. It’s designed to manage TVs, DVD players, sound systems, and more. Programming for each device involves entering a unique code or utilizing the learning function, as detailed earlier in this manual.
To switch between devices, use the dedicated device buttons on the remote. These buttons typically correspond to TV, DVD, AUX, or similar labels. Ensure each device is properly programmed and assigned to the correct button for seamless control.
Some models support a larger number of devices than others. Consult your remote’s specifications for the maximum supported devices. Careful setup and labeling will ensure effortless management of your entire home entertainment system.
Customizing Button Functions
Personalize your experience! Advanced One For All remotes offer button customization, allowing you to tailor the remote to your specific needs. This feature lets you reassign functions to buttons you use most frequently, streamlining operation.
Access the customization menu through the remote’s settings, typically initiated by pressing and holding a specific button combination. From there, you can select a button and assign it a new function from a list of available options.
Remember to save your changes after each customization. This ensures your personalized settings are retained. Experiment with different configurations to create a remote layout that perfectly suits your viewing habits and device setup.
Maintenance and Care
Keep it pristine! Regularly clean your remote with a soft, dry cloth. Replace batteries when performance diminishes, and store it in a cool, dry place.
Cleaning Your Remote
Maintaining a clean remote ensures optimal performance and longevity. Before cleaning, always remove the batteries to prevent accidental operation and potential damage. Use a soft, dry cloth to wipe down the entire surface of the remote, removing dust, fingerprints, and smudges.
For stubborn dirt or grime, lightly dampen the cloth with water – never apply liquids directly to the remote. Avoid using harsh chemicals, abrasive cleaners, or solvents, as these can damage the plastic casing and buttons. Pay particular attention to the crevices around the buttons, where dirt tends to accumulate.
A cotton swab lightly dampened with water can be used to carefully clean these areas. Ensure the remote is completely dry before reinserting the batteries. Regular cleaning will keep your One For All remote looking and functioning its best!
Replacing Batteries
When the remote stops responding or the range diminishes, it’s time to replace the batteries. Typically, One For All remotes require AA or AAA alkaline batteries – check your model’s specifications for the correct type. Locate the battery compartment, usually on the back or underside of the remote, and gently slide open the cover.
Remove the old batteries, noting the correct polarity (+ and -) indicated inside the compartment. Insert the new batteries, ensuring they are aligned properly. Close the battery compartment cover securely. Dispose of used batteries responsibly, following local regulations for battery recycling.
Using high-quality alkaline batteries will provide the longest-lasting performance. Avoid mixing old and new batteries, or different types of batteries.
Storage Guidelines
To maintain your One For All remote’s functionality and appearance, proper storage is essential. When not in use for extended periods, remove the batteries to prevent potential corrosion and battery leakage, which could damage the internal components. Store the remote in a cool, dry place, away from direct sunlight, extreme temperatures, and humidity.
Avoid storing the remote near strong magnetic fields or sources of interference, as these could affect its performance. A soft pouch or the original packaging can help protect the remote from dust and scratches; Do not place heavy objects on top of the remote, as this could damage the buttons or casing.
Regularly check the remote for any signs of damage or wear, and address any issues promptly.
Resources and Support
Need help? Access online manuals, FAQs, and troubleshooting guides on the One For All website. Contact customer support for personalized assistance and warranty details.
Online Manuals and FAQs
Comprehensive Support at Your Fingertips: One For All provides a wealth of resources online to assist you with your remote control. Visit the official website to download detailed user manuals in PDF format, covering a wide range of models, including the URC-7711 and URC1240 Contour.
These manuals offer step-by-step instructions for everything from initial setup and battery installation to advanced programming techniques like direct code entry and learning functionality.
A frequently asked questions (FAQ) section addresses common issues, such as remote not responding, incorrect code errors, and troubleshooting learned functions. You’ll find solutions to quickly resolve problems and maximize your remote’s capabilities. The online resources are regularly updated, ensuring you have access to the latest information and support.
Contacting Customer Support
Need Personalized Assistance? If the online manuals and FAQs don’t resolve your issue, One For All offers dedicated customer support channels. While specific contact details may vary by region, generally, you can find support options on their official website.
Look for a “Contact Us” or “Support” section to access email forms, live chat features, or phone numbers. Be prepared to provide your remote control model number for efficient assistance.
Customer support representatives can guide you through programming procedures, troubleshoot complex issues, and provide warranty information. They are equipped to address a wide range of concerns, ensuring you receive the help you need to enjoy your One For All remote control to its fullest potential.
Warranty Information
Protecting Your Investment: Your One For All universal remote control is backed by a limited warranty, safeguarding against manufacturing defects. The warranty period typically begins from the date of purchase, and its duration can vary depending on the specific model and region.
Generally, the warranty covers defects in materials and workmanship under normal use. It does not cover damage resulting from misuse, accidents, or unauthorized modifications.
To make a warranty claim, retain your proof of purchase and contact One For All customer support. They will provide instructions on how to initiate the claim process and may require you to return the remote for inspection. Review the full warranty terms and conditions on the official One For All website for complete details.